A very common issue among users is “How to Replace toner in Brother Printer”. Initially, I thought replacing the printer toner would be straightforward. It would be as easy as taking out the old cartridge and putting in a new one. But when I actually tried it practically, it took me hours to decide whether I was doing it right or whether I should buy a new printer instead.
I remember that time when I was manually trying to replace the toner, the toner in one hand, and on the other hand, I had the toner powder, and an error message was displayed on the screen. The printer did not recognize a newly installed toner cartridge, and I kept on doing it again and again, but couldn’t replace it.
At that time, I dug deeper and learned ‘How to Replace the Brother Printer toner‘ and found simple steps that easily worked for me. Try all the steps mentioned below to replace the toner in your printer so that you don’t face similar issues in the future.
When to Replace Toner in a Brother Printer
A toner cartridge is a part of a printer that can be replaced and contains a special powder known as toner. The Brother printer toner is essential for printing because it goes on paper to make pictures and text. When the toner is empty, you can replace it to ensure your printer continues to print clearly.
When should you replace the toner in your Brother printer?
Faded Prints
When printed pages start to look faded or light, it indicates that your printer toner is low and needs replacement.
Blank Pages
You need to replace the toner when your printer produces a completely blank page. This is an indication that your toner has run out, and it is time to replace it.
Low Toner Warning
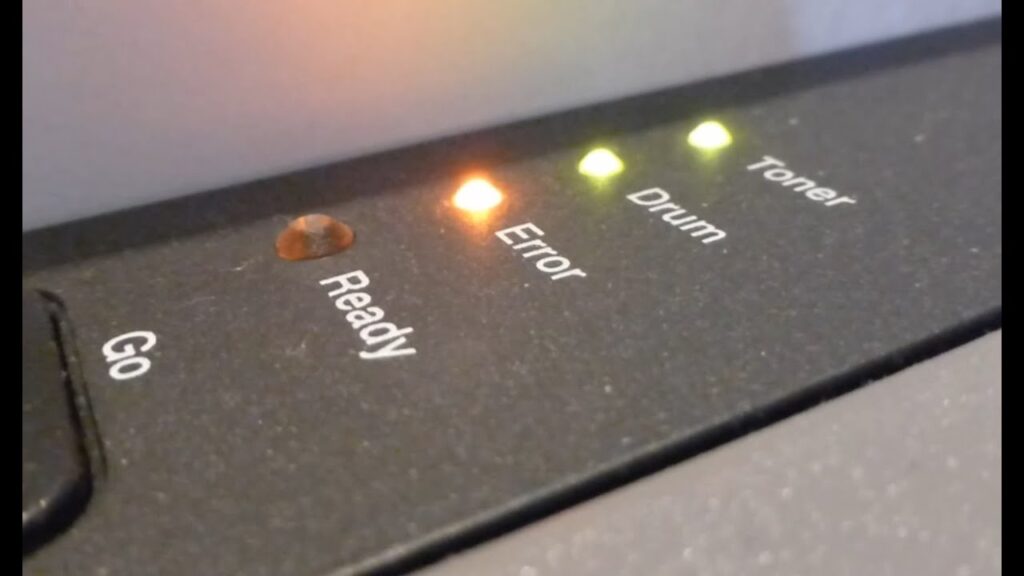
Some Brother printers warn you that your toner is running low. When you see a blinking light or a message, it is a hint to get a new toner as soon as possible. In addition, when your printer prints pages with lines, is of poor quality, or is faded, it means that your printer is having some issues or your toner is empty. When you experience this, you might need to check your toner or ink and replace it as required.
How to Choose the Right Toner for Your Brother Printer
Before you know the process of ‘How to Replace toner in Brother Printer‘, be sure to buy a toner that works with your specific model. If you want to know the right toner for your printer, this is what you can do:
Check Printer Model
Check the name of your printer model. Generally, you can find it on the top or front of the printer. Knowing the printer’s model name is important because it helps you choose the right toner for your particular printer model.
Check Cartridge Packaging
Look carefully at the packaging of your old toner cartridges. Usually, it provides information about the right toner your printer requires, hinting that you are buying the right toner for your printer.
Things to Consider While Replacing Toner on Your Brother Printer
You must know certain things when you replace the toner in your printer. These are the things that you have to follow during the process.
- Turn off the printer after you replace the toner cartridge until you see the Ready mode.
- When you see that the toner is low, you should prepare for the new cartridge.
- If you want to have quality printing results, it is best that you install the toner cartridge.
- Avoid refilling the toner cartridge, as it can damage your printer.
- Try not to leave the toner cartridge open for a long time, as this will shorten its life.
How to Replace Toner in Brother Printer: 5 Easy Steps
When you notice the above signs of needing to replace a toner, it is the right time to get one for your printer. Do not worry; the process is simple. During this replacement process, you have to make sure that your printer is working well and making clear prints without any issues.
Step 1: Turn Off and Unplug the Printer
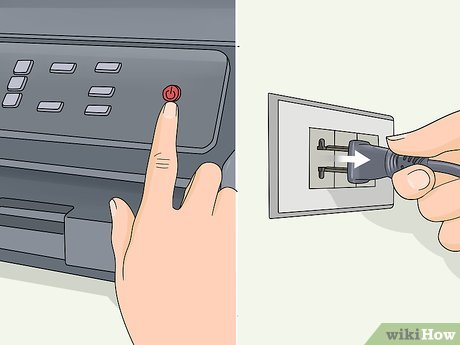
Before you change the toner on your printer, it would be helpful if you had plenty of paper by your side. This will help in case there is any toner leakage. Ensure the printer is turned off and not connected to any power devices or outlets. This will make it easy for you to replace the toner without making a mess.
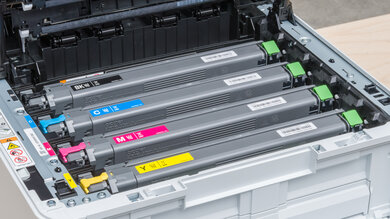
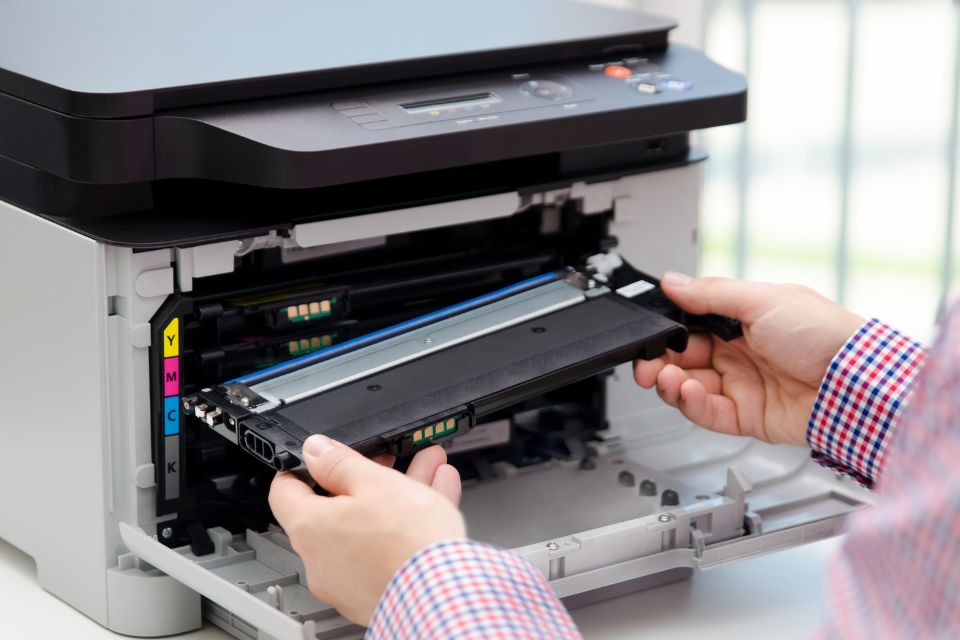
Step 2: Separate the Drum and Cartridge
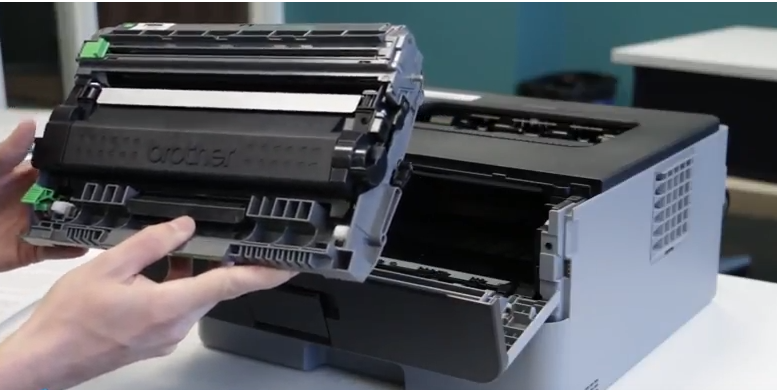
Open the printer’s front cover, then remove the drum unit (which transfers the toner to the paper) and toner cartridge (which holds the fine dry powder called toner) together, and then separate them as required. During this process, make sure no toner spills. If it does, you can clean it with paper. Do not touch the electrode (which controls and directs the flow of ink droplets), as static electricity can damage it.
To separate the cartridge and drum, click on the green lever. Keep them on paper, away from things like electronic devices and magnets. Damage caused to the printer during the replacement process may not be covered under the manufacturer’s warranty.
Step 3: Replace the Drum or Cartridge
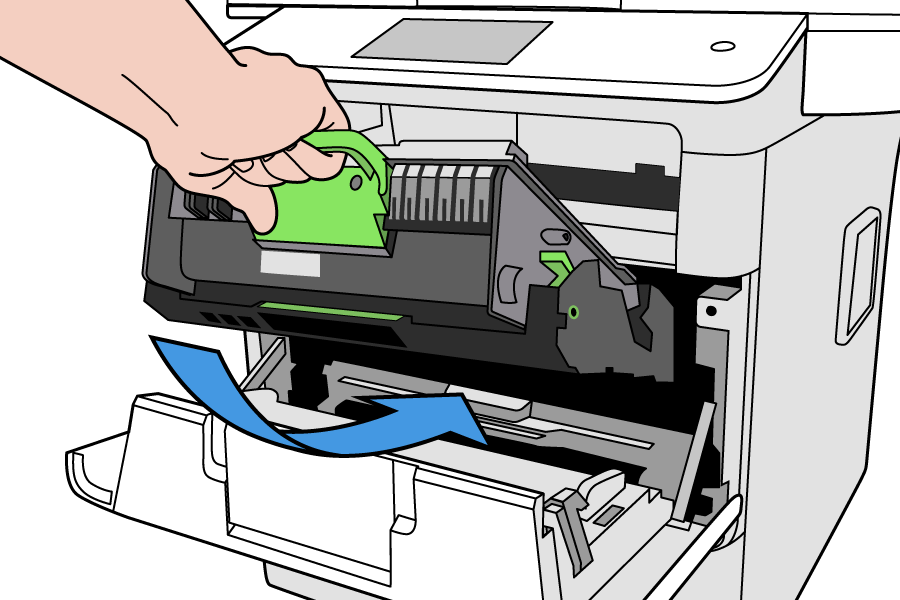
So, how can you replace the printer’s toner? It is an easy process! If you are changing the Drum, you have to put a new one in the printer. If you are replacing a new cartridge toner, take out the drum from the printer and remove the old toner. Install the new toner cartridge by putting it securely in the drum unit.
Brother toner cartridges are generally easy to install and can last up to 2,600 pages, depending on usage. Similarly, a drum unit usually lasts longer, around 12,000 pages.
Step 4: Secure the Drum and Cartridge
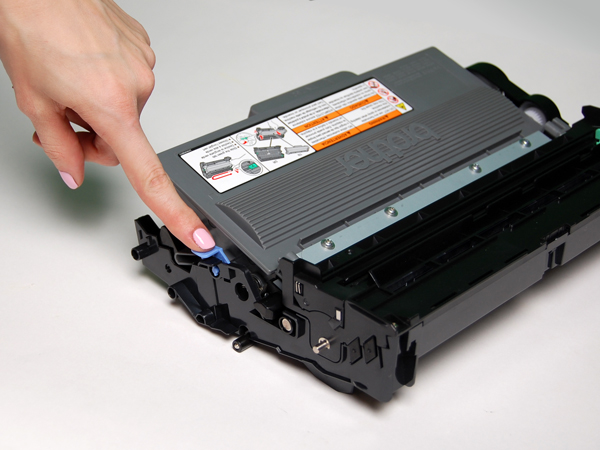
After replacing either the drum or toner, ensure they are properly secured. Once secured, push them together until you hear a click, indicating a successful installation.
Step 5: Check If the Toner Works Now
Turn on your printer and check if you can see the new toner. Some printers have an LED to indicate the drum or toner status. Also, print a test page to see if the newly installed toner cartridge is working.
Frequently Asked Questions (FAQs)
Can I Install Third-Party Toner in My Brother Printer?
Yes, there is no problem with using third-party toners on your Brother printer. Many third-party companies manufacture toners designed to be compatible with Brother printers. Moreover, it is a more affordable option than the original Brother toner cartridges. However, you have to make sure that the third-party toner is compatible with your particular printer model.
What to Do if Brother Printer Shows Error After Replacing Toner?
If you are still experiencing an error after replacing the toner, first check whether you have installed it correctly. Take the toner out and put it back, ensuring that it is in the right place. Switch off the printer, unplug it for about 30 seconds, and then plug it back in and switch it on. Additionally, you should also make sure that your PC has updated drivers and check for updates on Brother’s official website, https://setup.brother.com.
Why Won’t the Brother Printer Print from a Computer?
If your printer is not printing from a computer, the issue could be due to software problems, connection issues, or hardware malfunctions. To fix the issue, first verify the physical connection (network or USB cable), and then check the driver and other potential problems like ink levels or paper jams.
How to Install Brother Printer Drivers?
Follow the quick and easy steps below to install printer drivers:
- Navigate to Brother’s official website at Setup.brother.com.
- Then, find the Brother Drivers and Downloads option.
- Now, find your Brother printer model in the search bar.
- After that, you’ll see a list of available printer drivers on the screen.
- Next, download the most suitable package for your brother printer.
- Lastly, continue with installing the driver file.